At this point we have a pair of programs written in Python and C#. These programs are used to run the ccextractor program with extension and path parameters. The next step in our evolution is to run our code on other platforms namely macOS and Linux. This post will demonstrate running code on both of those platforms.
Running on macOS
Before you start working on the code, you’ll need to get your Mac set up to 1) Install the ccextractor application and 2) Python 3 code.
Installing the extractor is simple and is done via the Homebrew infrastructure used by Mac Developers. To install the ccextractor do the following :
Install Homebrew if it’s not already installed. Simply run this script (copied from https://brew.sh/ ) from a terminal window.
/bin/bash -c "$(curl -fsSL https://raw.githubusercontent.com/Homebrew/install/master/install.sh)"Once you have installed Homebrew, you can install the ccextractor program by issuing the following command:
brew install ccextractorAfter installing the ccextractor, test it by typing ccextractor from the terminal window. You should see a screen full of help information. Now insure Python3 is installed. From a terminal window type: python3
If Python 3 is installed you’ll see the Python’s interactive window. If no,t you may be promoted to install the Command Line tools for OSX. If so, run that installer. If the Command Line Tools installer does not run directions for installing Python 3 can be found here: https://docs.python-guide.org/starting/install3/osx/
Now it’s time to test the code. Clone this repo:
https://github.com/rjpaddock/ExtractorRunner.gitNow from a terminal window change into the folder where you cloned that repo and run the following command:
python3 run_cc.py --extension mpg --directory [[INSERT YOUR DIRECTORY HERE]]You will be presented with the following error information:
Traceback (most recent call last):
  File "run_cc.py", line 15, in <module>
    subprocess.run([extractor_name,  os.path.join(args.directory, file)])
  File "/Library/Developer/CommandLineTools/Library/Frameworks/Python3.framework/Versions/3.8/lib/python3.8/subprocess.py", line 489, in run
    with Popen(*popenargs, **kwargs) as process:
  File "/Library/Developer/CommandLineTools/Library/Frameworks/Python3.framework/Versions/3.8/lib/python3.8/subprocess.py", line 854, in __init__
    self._execute_child(args, executable, preexec_fn, close_fds,
  File "/Library/Developer/CommandLineTools/Library/Frameworks/Python3.framework/Versions/3.8/lib/python3.8/subprocess.py", line 1702, in _execute_child
    raise child_exception_type(errno_num, err_msg, err_filename)
FileNotFoundError: [Errno 2] No such file or directory: 'ccextractorwin'
This error is because the name of the ccextractor application is different in the Windows environment. Check out the last line. What is the fix for this ?
To fix this you need to call a different executable based on operating system. Lucky for us Python has a built in library for just such a thing. To check what platform your code is running import the platform library at the top of your python file
import platformNext add the following code to your script:
extractorname = ''
if platform.system() == 'Windows':
  extractor_name = 'ccextractorwin'
elif platform.system() == 'Darwin':
  extractor_name = 'ccextractor'
elif platform.system() == "Linux":
  extractor_name = 'ccextractor'
Now run the application. Your script should start processing files with no error.
NOTE: The code in the Repository already has this change applied. You’re welcome 🙂
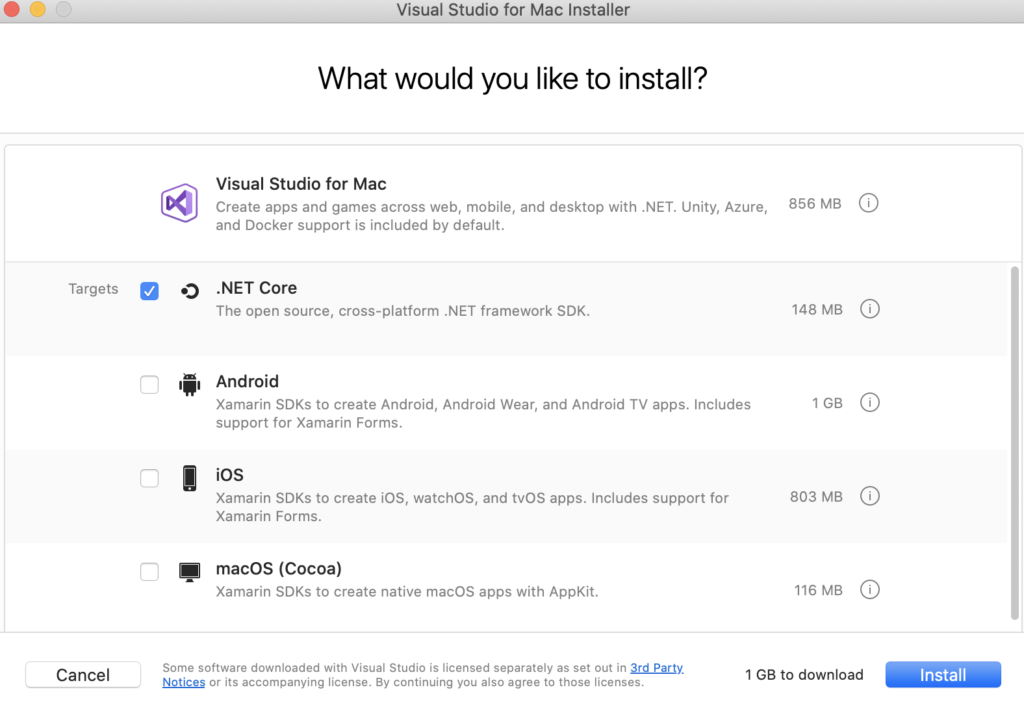
The next step is to get the C# code up and running on macOS. This process was much easier than I anticipated, as Microsoft has created a macOS version of Visual Studio. The first step is to install Visual Studio Mac from the Microsoft website https://visualstudio.microsoft.com/vs/mac/
When installing the application make sure to install it with the .NET Core option selected:

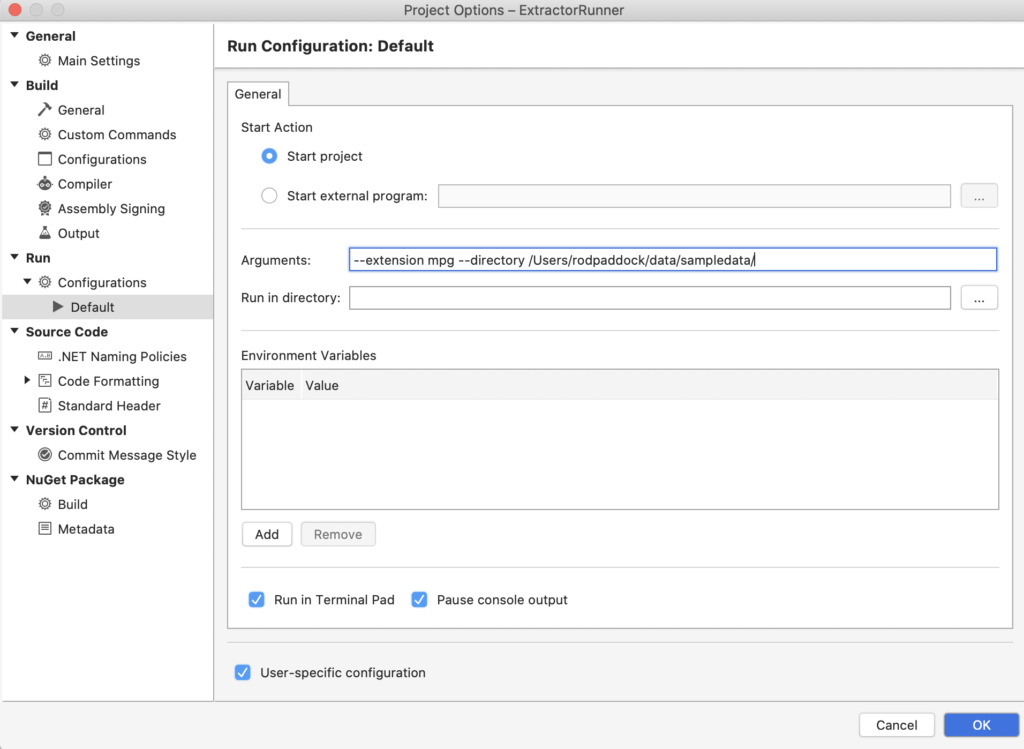
Once the installer completes, open the ExtractorRunner solution from the folder you pulled code into. Open the options dialog for the project and set the command line parameters you have been using to test:

Run your code now. You will now see an error in the console window of your application:

This is very similar to the Python error and requires the same solution. .NET Core also included a set or libraries to determine your operating system. Add the following snippet to the top of your program:
using System.Runtime.InteropServices;Now add the following block of code to your C# program:
var extractor_exe_path = "";
if (RuntimeInformation.IsOSPlatform(OSPlatform.Windows))
  {
  extractor_exe_path = "ccextractorwin";
  }
else if (RuntimeInformation.IsOSPlatform(OSPlatform.OSX))
  {
  extractor_exe_path = "ccextractorwin";
  }
else if (RuntimeInformation.IsOSPlatform(OSPlatform.Linux))
  {
  extractor_exe_path = "ccextractor";
  }
Now run your code and you should see proper output in the runner window.
Now you have the same command line functionality for both the Python and C# versions of this program and can run the code on the Mac and Windows. Now lets take a look at the process of running thus under Ubuntu.
Running on Linux (Ubuntu)
Before modifying the our runner programs we need to install the ccextractor application on our Linux server. Directions for installing ccextractor on Linux can be found here: https://github.com/CCExtractor/ccextractor/wiki/Installation
Basically you pull the code from Github, and run the typical process of building applications in the Linux world. I was lucky as the code “just compiled” and ran using the instructions provided. Once I did that I had to make one simple change to the script and was able to execute our runner application. The branch of code to determine the proper program to run looks like this:
if platform.system() == 'Windows':
  extractor_name = 'ccextractorwin'
elif platform.system() == 'Darwin':
  extractor_name = 'ccextractor'
elif platform.system() == "Linux":
  extractor_name = '/home/azureuser/data/projects/ccextractor/linux/ccextractor'
Now I was able to run the code using the same command line options we used on the Mac.
python3 run_cc.py --extension mpg --directory /home/azureuser/data/sampledata/Now that the Python code is up and running you can turn your sites onto running the C# code next. To do this you need to first install the .NET Core SDK on your Ubuntu instance. This is done by following the directions from this page: https://docs.microsoft.com/en-us/dotnet/core/install/linux-ubuntu
If you are running a different flavor of Linux you can find directions on this page: https://docs.microsoft.com/en-us/dotnet/core/install/linux
Once you have the SDK installed , change into the folder where you cloned the GitHub repository and run the following command:
dotnet buildThis will build an executable file and put it in a sub-folder (off the root of your code) in this location /bin/Debug/netcoreapp3.1 There is one more step though. Before you can run the code you need to change your Program.cs file to use the following executable selection code:
var extractor_exe_path = "";
if (RuntimeInformation.IsOSPlatform(OSPlatform.Windows))
  {
	  extractor_exe_path = "ccextractorwin";
	}
else if (RuntimeInformation.IsOSPlatform(OSPlatform.OSX))
	{
		extractor_exe_path = "ccextractor";
	}
else if (RuntimeInformation.IsOSPlatform(OSPlatform.Linux))
	{
		extractor_exe_path = "/home/azureuser/data/projects/ccextractor/linux/ccextractor";
	}
Run the dotnet build command again and change into that folder and run the following command:
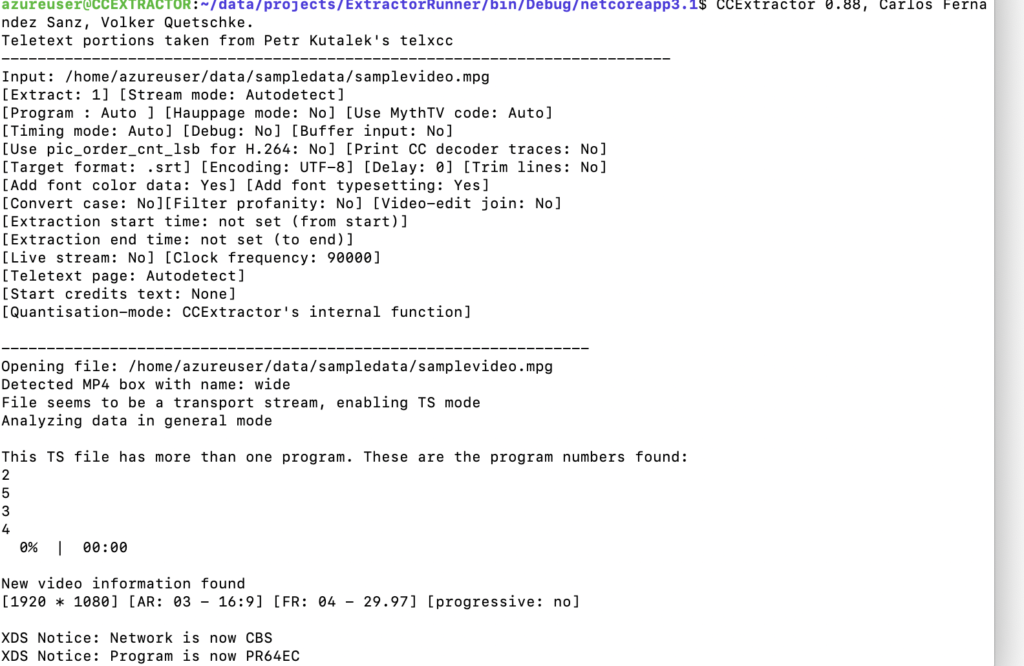
./ExtractorRunner --extension mpg --directory /home/azureuser/data/sampledata/The following screen shows the ccextractor running on Ubuntu via the c# Extractorrunner program.

That’s how you create a totally cross platform application in Python and C#. I was pleasantly surprised how simple it was to build and run the C# code on Mac and Linux which is a testament to the work the Microsoft team has done over the last few years. I hope you enjoyed this series. Next week I hope to return with a recap of this series with a few additional tips. Then it’s on to writing about other programming items.
