“Well Hello Rodney!”, was my nana’s favorite greeting. Every time I called or visited; I was greeted with the familiar “Well Hello Rodney!”. I am sitting here reflecting on these words and feeling a bit glum as I will never hear these words again. Thursday night I received word that my nana had passed from a brief but significant illness. Over the last few days many different feelings of sadness overcame me, and many tears were shed. But after the tears abated, my thoughts turned to the happiness and joy my nana brought me and my family.
A lot of who I am today comes from hanging around my maternal grandparents Joyce and Ray. When I was growing up, I spent many weekends at the grandparents house in Sylmar, CA. It was during these visits that many of my nerd like hobbies and proclivities formed. One of my favorite memories was sitting in the living room with my grandma as she drank Tab and taught me the how to play blackjack. I was probably 8 or 9 years old. I do believe my degenerate gambling hobby came as result of this particular visit. LOL. I find memories amazing as I can recall this moment with complete clarity. I also believe a lot of my artistic ability comes from my nana’s love of art. Nana was one heck of a painter and many of her works adorn the homes of my mom, aunts, and uncles. She was a damn good painter. While I am not a painter, I do believe that my creativity comes from being around her while she worked. The smell of oil paint brings back memories of her,
While thinking about nana my mind also wanders to my grandfather Ray who also had a huge influence on me. The funny part of this is that I had no real idea of his influence on me until his passing some 20 years ago.
When we were talking about his life, we talked about what he did on Christmas morning before the gathering of our large and expanding family. What he did that morning was to get in his car to spend time driving around Hollywood. You see the lack of traffic on Christmas morning makes it a good time to drive around to just check stuff out. This story might seem insignificant but in this boy’s life this was an AMAZING revelation. As many of my friends have witnessed first-hand, one of my all-time favorite things to do, is to drive around Hollywood checking stuff out. Every trip to LA is yet another opportunity to check out new and old places behind the wheel of a car. My best friend calls this “Rod’s Reality Tour”. From Vasquez Rocks to The Pink Motel, I love showing my friends the around the LA area. I NEVER get bored doing this. I’m in my 50s now and still love exploring. LA is a huge place and there are always new sites to find.
Another thing that came from my grandparents was my absolute love of movies. I do believe that this love of movies was not unique to me but to all of their children. I can remember in high detail watching movies whenever I visited my family’s homes. I remember watching the Late Great Planet earth at the Winnetka drive in with my aunt Nancy or seeing a double feature of Jaws 2 and Grey Lady Down at yet another drive in (we saw lot so movies at the drive in) with my aunt Lisa. I also remember watching the dawn of MTV at my aunt Carries house and checking out movies on the Z channel that my grandfather had installed in his home instantly. Movies are in my family’s DNA. The beauty of this is the love of movies has transcended multiple generations of my family. We still go to the movies on a regular basis.
There are many, many more stories just like these. If you ask my cousins, I bet they can share many similar stories. I’m also pretty sure that “Well Hello Rodney” was not a greeting solely for me. I bet that it was also use for my cousins too. It was also “Well Hello… Sara or Rebecka or Kelsey or Brandon or Bridget or Aaron” You get the gist. I am betting we all got the same greeting as our nana loved us all and was always happy to hear or be around us.
Now there is only one greeting left for her and it reads like this: “Well Hello Ray!”
One question that always seems to pop up when you are beginning a new campaign is: “Who’s gonna play the cleric?”. This job generally goes to the newcomer or the last to arrive. The cleric, as a “role-playable” character has been grossly neglected. Throughout my years as a role-player and dungeonmaster, many people who play clerics have play them incorrectly, not incorrect as in the rules the rules but incorrect as a developed character. Most people play clerics as boring magic-users with healing spells vs. deeply rich characters with an interesting background. This article will discuss some cleric archetypes you can use in your games to give life to a character class deemed by many as boring.
The Deity and the Church
The deity dedicated cleric is the most way people play clerics. The primary focus of this character is to attract followers to their deity’s philosophies. The pinnacle of this archetype is the physical construction of a church or shrine in the name of their deity. However, clerics of this archetype are never satisfied with the opening of just one church or gaining half a dozen followers, they will be constantly trying to gain more and more followers and opening more churches until the time of they leave to meet their maker.
The Cleric and the Cause
One possible way to liven up the cleric is to give him or her a cause. During the early stages of the characters life they may adopt a particular cause. Examples of a cause might be: the recovery of the “Holy Icon of Mazdar” or the establishment of a new religious outpost in the “Barbarian Tribes of Highdale”. The character’s life would be spent seeking to achieve the goals of their cause. Sometimes this cause might put the characters in jeopardy or might give them potentials for new adventures
The Cleric as Shaman
Usually portrayed as an NPC, the shaman or witchdoctor is a path seldom travelled by a player. The existence of Barbarian class opens possibilities for an interesting barbarian specialty: the barbarian shaman. The barbarian shaman would specialize in the use of primitive spells and would be more of a land or nature orientated cleric, much like a druid. This specialty might also have unique abilities to such as the ability to craft healing balms or salves potions from the land.
The Cleric in Exile
Another possible playing a cleric is to have that cleric fall from grace within their church. The exiled cleric would still spread the word of their deity with or without permission. Or they might preach a very different version of their religion causing them to be labeled a heretic. This archetype would provide for some interesting adventures especially when the cleric’s party visits a town or city where the cleric’s religion is active.
The Cleric as Wanderer
Another closely related cleric would be the wanderer. The wanderer cleric would have no one place designated as his or her home base. Instead opting to travel about spreading the word of his or her god. The wanderer cleric would be a chief source of news in small towns and would be greatly appreciated. If bards are active within a campaign a wandering cleric and a bard would make for a good combination.
Some examples of refugee and wandering clerics would be: “Warren Borinias” the traveling preacher of Helm and the bringer of good tidings or “Kalox the Banished”, fleeing the church of Athena for refusing to sacrifice war criminals.
The Cleric as Charlatan
“Give me a religion and I give you a profit center” says Kaj the Profit, a well known and highly respected figure among the desert tribal regions. Preaching fire and brimstone this cleric seeks food, cash and favors in order to make people “right with their gods” while extracting as much money as possible before hitting the road to their next conquest. This archetype has many possibilities as the cleric might find themselves in situations where they are being hunted or recognized by authorities as false preachers.
As can be seen the cleric can be a class as lively as any knightly-knight of decrepit arch-mage, This article is dedicated to the people might be reluctant to play a character or are looking new ideas to breathe life into their existing character
One of the applications I’m working on has the need to store Privately Identifiable Information (PII) in it’s databases. We have chosen to store this information using the RSA Public Key Cryptography provider included in the .NET Core base libraries.
We all use Public Key Cryptography (PKC) every day. If you are reading this you are using PKC as the underpinnings of HTTPS use public key cryptography. Basically PKC is implemented using two individual keys the PUBLIC one and the PRIVATE one. The public key is used to encrypt data and the private key is used to decrypt data. As it name implies you can distribute the PUBLIC key … well… publicly. Meaning you can give it out freely. The PRIVATE key is yours and yours alone and is the only key that can decrypt your data.
For our needs we created a simple library for managing our PKC needs. This library has 3 parts:
1) Function to generate PUBLIC and PRIVATE keys
2) Function to encrypt a string
3) Function to decrypt a string.
Lets take a look at generating keys first. To to this you need to create a class that will be used to return the PUBLIC and PRIVATE key strings. The class looks like this:
public class KeyPair
{
	public string PublicKey { get; set; } = "";
	public string PrivateKey { get; set; } = "";
}
Next you need to create an instance of the RSACryptoServiceProvider class. When creating an instance of this class you need to pass it the size of your keys.
The size of the key specifies the strength of the key you are using. Meaning how difficult will it be to crack. The larger the more difficult it is to crack. Our code stores the size of the key in a CONST called Keysize. After creating an instance of the provider your an call the ToXmlString() of the provide which will return your PUBLIC and PRIVATE keys depending on the boolean you pass to the function. Passing a false value returns the PUBLIC key, passing a true value returns the private key. The following code shows how to create and return a PUBLIC/PRIVATE key pair.
using System;
using System.Security.Cryptography;
using System.Text;

namespace CryptoLibrary
{
	public class CryptoTools
	{
		private const int KeySize = 2048;

		public KeyPair GetKeyPair()
		{
			var provider = new RSACryptoServiceProvider(KeySize);
			var retVal = new KeyPair()
			{
				PublicKey = provider.ToXmlString(false),
				PrivateKey = provider.ToXmlString(true)
			};
			return retVal;
		}

	public class KeyPair
	{
		public string PublicKey { get; set; } = "";
		public string PrivateKey { get; set; } = "";
	}

}
Now you can call the library to generate your keypair.
var tools = new CryptoTools();
var keys = tools.GetKeyPair();
This code returns your keys in an XML string that looks like this:
With these two keys you can write some simple functions to Encrypt and Decrypt strings. The steps to encrypt a string are:
1) Create an instance of the RSACryptoServiceProvider class.
2) Load the PUBLIC key using the FromXmlString() function.
3) Convert your string to a byte[] array
4) Encrypt the string (returned as byte[] array)
5) Turn the byte[] array into a base 64 string.
6) Return the string.
The steps to decrypt a string are:
1) Create an instance of the RSACryptoServiceProvider class.
2) Load the PRIVATE key using the FromXmlString() function.
3) Convert your string to a byte[] array
4) Decrypt the string (returned as byte[] array)
5) Turn the byte[] array into a UTF8 string.
6) Return the string.
The following code represents this functionality:
public string Encrypt(string publicKeyXML, string itemToEncrypt)
{
	var provider = new RSACryptoServiceProvider(KeySize);
	provider.FromXmlString(publicKeyXML);

	byte[] bytes = Encoding.UTF8.GetBytes(itemToEncrypt);
	var encryptedData = provider.Encrypt(bytes,true);
	var retval = Convert.ToBase64String(encryptedData);
	return retval;
}

public string Decrypt(string privateKeyXML, string itemToDecrypt)
{
	var provider = new RSACryptoServiceProvider(KeySize);
	provider.FromXmlString(privateKeyXML);

	byte[] bytes = Convert.FromBase64String(itemToDecrypt);
	var encryptedData = provider.Decrypt(bytes, true);
	var retval = Encoding.UTF8.GetString(encryptedData);
	return retval;
}
The following code shows how to generate keys, encrypt the data and descrypt the data.
var tools = new CryptoTools();
var keys = tools.GetKeyPair();

Console.WriteLine(keys.PublicKey);
Console.WriteLine(keys.PublicKey);

var encrypted = tools.Encrypt(keys.PublicKey, "555-12-3456");
var decrypted = tools.Decrypt(keys.PrivateKey, encrypted);

var encrypted2 = tools.Encrypt(keys.PublicKey, "4000-0000-0000-0002");
var decrypted2 = tools.Decrypt(keys.PrivateKey, encrypted);
The complete library for these tools:
using System;
using System.Security.Cryptography;
using System.Text;

namespace CryptoLibrary
{
	public class CryptoTools
	{
		private const int KeySize = 2048;

		public KeyPair GetKeyPair()
		{
			var provider = new RSACryptoServiceProvider(KeySize);

			var retVal = new KeyPair()
			{
				PublicKey = provider.ToXmlString(false),
				PrivateKey = provider.ToXmlString(true)
			};

			return retVal;

		}

		public string Encrypt(string publicKeyXML, string itemToEncrypt)
		{
			var provider = new RSACryptoServiceProvider(KeySize);
			provider.FromXmlString(publicKeyXML);
			byte[] bytes = Encoding.UTF8.GetBytes(itemToEncrypt);
			var encryptedData = provider.Encrypt(bytes,true);
			var retval = Convert.ToBase64String(encryptedData);
			return retval;
		}

		public string Decrypt(string privateKeyXML, string itemToDecrypt)
		{
			var provider = new RSACryptoServiceProvider(KeySize);
			provider.FromXmlString(privateKeyXML);
			byte[] bytes = Convert.FromBase64String(itemToDecrypt);
			var encryptedData = provider.Decrypt(bytes, true);
			var retval = Encoding.UTF8.GetString(encryptedData);
			return retval;
		}
	}

	public class KeyPair
	{
		public string PublicKey { get; set; } = "";
		public string PrivateKey { get; set; } = "";
	}
}
I hope that you find these tools useful. In my next post I’ll show how to combine this solution and the hashing library shown in my Building a Simple C# Hashing Utility post to build a bit more holistic solution to handling encrypted data.
At this point we have a pair of programs written in Python and C#. These programs are used to run the ccextractor program with extension and path parameters. The next step in our evolution is to run our code on other platforms namely macOS and Linux. This post will demonstrate running code on both of those platforms.
Running on macOS
Before you start working on the code, you’ll need to get your Mac set up to 1) Install the ccextractor application and 2) Python 3 code.
Installing the extractor is simple and is done via the Homebrew infrastructure used by Mac Developers. To install the ccextractor do the following :
Install Homebrew if it’s not already installed. Simply run this script (copied from https://brew.sh/ ) from a terminal window.
Once you have installed Homebrew, you can install the ccextractor program by issuing the following command:
brew install ccextractor
After installing the ccextractor, test it by typing ccextractor from the terminal window. You should see a screen full of help information. Now insure Python3 is installed. From a terminal window type: python3
If Python 3 is installed you’ll see the Python’s interactive window. If no,t you may be promoted to install the Command Line tools for OSX. If so, run that installer. If the Command Line Tools installer does not run directions for installing Python 3 can be found here: https://docs.python-guide.org/starting/install3/osx/
Now it’s time to test the code. Clone this repo:
https://github.com/rjpaddock/ExtractorRunner.git
Now from a terminal window change into the folder where you cloned that repo and run the following command:
python3 run_cc.py --extension mpg --directory [[INSERT YOUR DIRECTORY HERE]]
You will be presented with the following error information:
Traceback (most recent call last):
  File "run_cc.py", line 15, in <module>
    subprocess.run([extractor_name,  os.path.join(args.directory, file)])
  File "/Library/Developer/CommandLineTools/Library/Frameworks/Python3.framework/Versions/3.8/lib/python3.8/subprocess.py", line 489, in run
    with Popen(*popenargs, **kwargs) as process:
  File "/Library/Developer/CommandLineTools/Library/Frameworks/Python3.framework/Versions/3.8/lib/python3.8/subprocess.py", line 854, in __init__
    self._execute_child(args, executable, preexec_fn, close_fds,
  File "/Library/Developer/CommandLineTools/Library/Frameworks/Python3.framework/Versions/3.8/lib/python3.8/subprocess.py", line 1702, in _execute_child
    raise child_exception_type(errno_num, err_msg, err_filename)
FileNotFoundError: [Errno 2] No such file or directory: 'ccextractorwin'
This error is because the name of the ccextractor application is different in the Windows environment. Check out the last line. What is the fix for this ?
To fix this you need to call a different executable based on operating system. Lucky for us Python has a built in library for just such a thing. To check what platform your code is running import the platform library at the top of your python file
Now run the application. Your script should start processing files with no error.
NOTE: The code in the Repository already has this change applied. You’re welcome 🙂
The next step is to get the C# code up and running on macOS. This process was much easier than I anticipated, as Microsoft has created a macOS version of Visual Studio. The first step is to install Visual Studio Mac from the Microsoft website https://visualstudio.microsoft.com/vs/mac/
When installing the application make sure to install it with the .NET Core option selected:
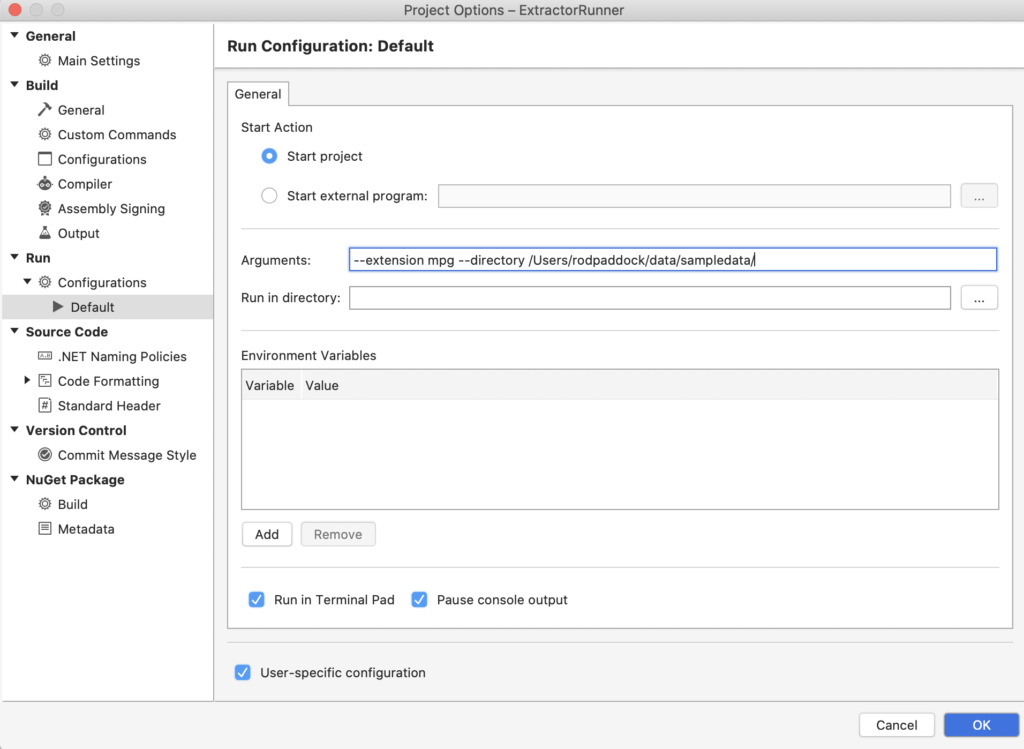
Once the installer completes, open the ExtractorRunner solution from the folder you pulled code into. Open the options dialog for the project and set the command line parameters you have been using to test:
Run your code now. You will now see an error in the console window of your application:
This is very similar to the Python error and requires the same solution. .NET Core also included a set or libraries to determine your operating system. Add the following snippet to the top of your program:
using System.Runtime.InteropServices;
Now add the following block of code to your C# program:
var extractor_exe_path = "";
if (RuntimeInformation.IsOSPlatform(OSPlatform.Windows))
  {
  extractor_exe_path = "ccextractorwin";
  }
else if (RuntimeInformation.IsOSPlatform(OSPlatform.OSX))
  {
  extractor_exe_path = "ccextractorwin";
  }
else if (RuntimeInformation.IsOSPlatform(OSPlatform.Linux))
  {
  extractor_exe_path = "ccextractor";
  }
Now run your code and you should see proper output in the runner window.
Now you have the same command line functionality for both the Python and C# versions of this program and can run the code on the Mac and Windows. Now lets take a look at the process of running thus under Ubuntu.
Basically you pull the code from Github, and run the typical process of building applications in the Linux world. I was lucky as the code “just compiled” and ran using the instructions provided. Once I did that I had to make one simple change to the script and was able to execute our runner application. The branch of code to determine the proper program to run looks like this:
Now that the Python code is up and running you can turn your sites onto running the C# code next. To do this you need to first install the .NET Core SDK on your Ubuntu instance. This is done by following the directions from this page: https://docs.microsoft.com/en-us/dotnet/core/install/linux-ubuntu
Once you have the SDK installed , change into the folder where you cloned the GitHub repository and run the following command:
dotnet build
This will build an executable file and put it in a sub-folder (off the root of your code) in this location /bin/Debug/netcoreapp3.1 There is one more step though. Before you can run the code you need to change your Program.cs file to use the following executable selection code:
var extractor_exe_path = "";
if (RuntimeInformation.IsOSPlatform(OSPlatform.Windows))
  {
	  extractor_exe_path = "ccextractorwin";
	}
else if (RuntimeInformation.IsOSPlatform(OSPlatform.OSX))
	{
		extractor_exe_path = "ccextractor";
	}
else if (RuntimeInformation.IsOSPlatform(OSPlatform.Linux))
	{
		extractor_exe_path = "/home/azureuser/data/projects/ccextractor/linux/ccextractor";
	}
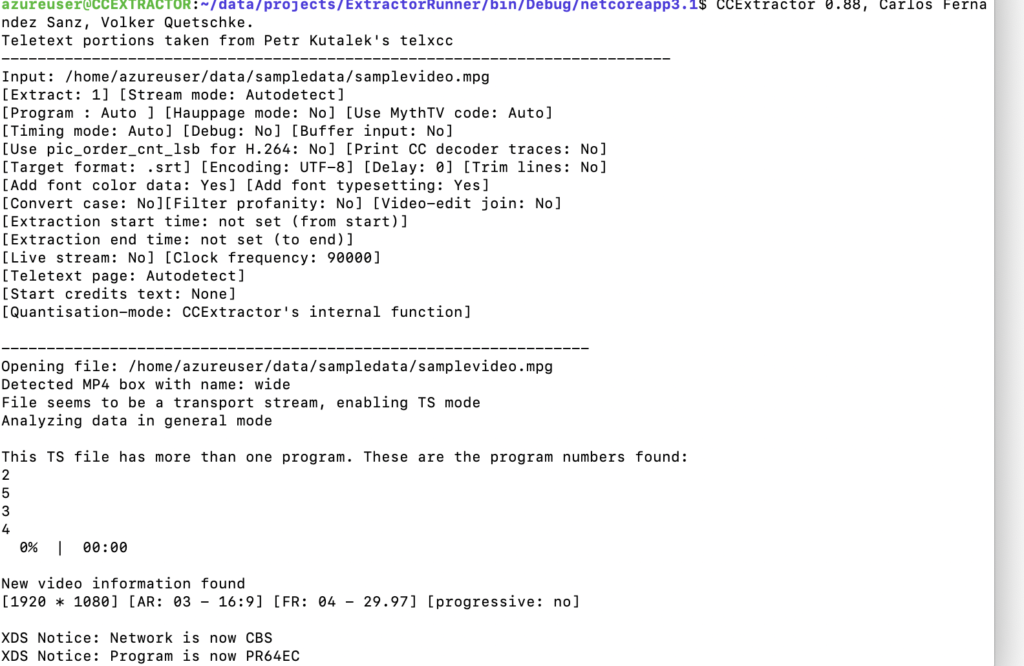
Run the dotnet build command again and change into that folder and run the following command:
The following screen shows the ccextractor running on Ubuntu via the c# Extractorrunner program.
That’s how you create a totally cross platform application in Python and C#. I was pleasantly surprised how simple it was to build and run the C# code on Mac and Linux which is a testament to the work the Microsoft team has done over the last few years. I hope you enjoyed this series. Next week I hope to return with a recap of this series with a few additional tips. Then it’s on to writing about other programming items.
In my last post, I showed you how to add named parameters to a Python script. These parameters –extension and –directory gave us the ability to run our programs with different extensions and located in different directories. This article will add the same functionality to the C# version of this program.
Where Python has an argument parser built into its native libraries, the .NET platform does not. Not to fear, there is a third-party library that you can install to add this needed functionality. This library is called CommandLineParser and can be installed via a Nuget package. You can install this library via the Nuget console by issuing the following command:
Install-Package CommandLineParser -Version 2.8.0
Once you have installed this library you need to build a class that will hold your parsed command line parameters. This class will be augmented with Attributes provided by the command line parser. The first parameter to add is the dynamic extension. To do this add the following class code to your program:
public class Options
{
  [Option(longName:"extension",HelpText = "Extension of files to convert",Default = ".mpg")]
  public string Extension { get; set; } = "";
}
This code has a string property called Extension. When you pass in the –extension parameter it will be stored on this property. The more interesting aspect of this class is the [Option] attribute.
[Option(longName:"extension",HelpText = "Extension of files to convert",Default = ".mpg")]
The longName property tells the CommandLIneParser library to parse an argument with the name –extension onto the Extension parameter. The HelpText and Default properties are self explanatory based solely on their name.
Now that you have created this class you can call the command line parser to populate your arguments onto an instance of the Options class. This code demonstrates how to do this:
var parsed = Parser.Default.ParseArguments<Options>(args);
var options = ((Parsed<Options>) parsed).Value;
This code takes the args collection passed to your program, parses them, and returns a parsed object. After parsing the argument collection you need to cast the .Value property of the parsed object into an instance you can use in your programming code. Your processing logic will now look like this:
var directory_to_import = "D:/Data/clients/RodPaddock/CCExtractor/";
var extractor_exe_path = "D:/Data/clients/RodPaddock/CCExtractor/ccextractorwin";
foreach (var fileName in Directory.GetFiles(options.Directory,$"*{options.Extension}"))
{
  Console.WriteLine(fileName);
  var process = new Process()
  {
    StartInfo = new ProcessStartInfo
	  {
  	    FileName = $"{extractor_exe_path}",
  	    Arguments = $"{fileName}",
	    UseShellExecute = true,
	   }
   };
	process.Start();
 }
Notice that the GetFiles() function now uses the Extension property of your Options class.
The next step is to add the directory to your Options class. To do this, simply add another property to your class with the appropriate name and options. Your class code will now look like this:
public class Options
{
  [Option(longName:"extension",HelpText = "Extension of files to convert",Default = ".mpg")]
  public string Extension { get; set; } = "";

  [Option(longName: "directory", HelpText = "Directory to process", Default = ".")]
  public string Directory { get; set; } = ".";
}
Notice that the DefaultValue property is a single period (.). This tells the get files routine to simple process the current directory.
Now you can incorporate your new Directory option into your application code. This is what the final version will look like:
using System;
using System.Diagnostics;
using System.IO;
using CommandLine;

namespace ExtractorRunner
{
	class Program
	{
		static void Main(string[] args)
		{

			var parsed = Parser.Default.ParseArguments<Options>(args);
			var options = ((Parsed<Options>) parsed).Value;

			var extractor_exe_path = "ccextractorwin";
			foreach (var fileName in Directory.GetFiles(options.Directory,$"*{options.Extension}"))
			{
				Console.WriteLine(fileName);
				var process = new Process()
				{
					StartInfo = new ProcessStartInfo
					{
						FileName = $"{extractor_exe_path}",
						Arguments = $"{fileName}",
						UseShellExecute = true,
					}
				};
				process.Start();
			}

		}
		public class Options
		{
			[Option(longName:"extension",HelpText = "Extension of files to convert",Default = ".mpg")]
			public string Extension { get; set; } = "";

			[Option(longName: "directory", HelpText = "Directory to process", Default = ".")]
			public string Directory { get; set; } = ".";
		}
	}
}
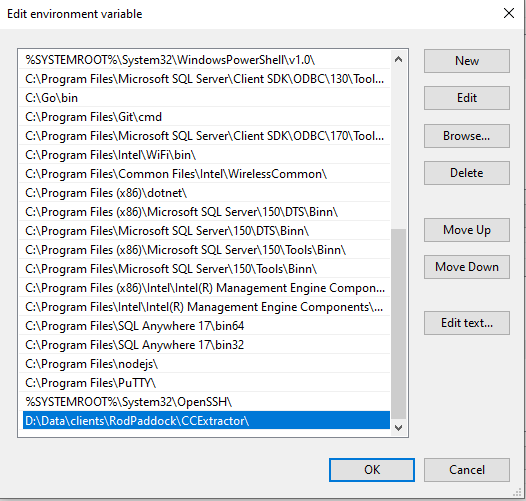
One item of note is the path to the EXE is just the name of the application. This is because in the last post we decided to add the Ccexteactorwin.exe file to our system PATH via the System Environment variables screen..
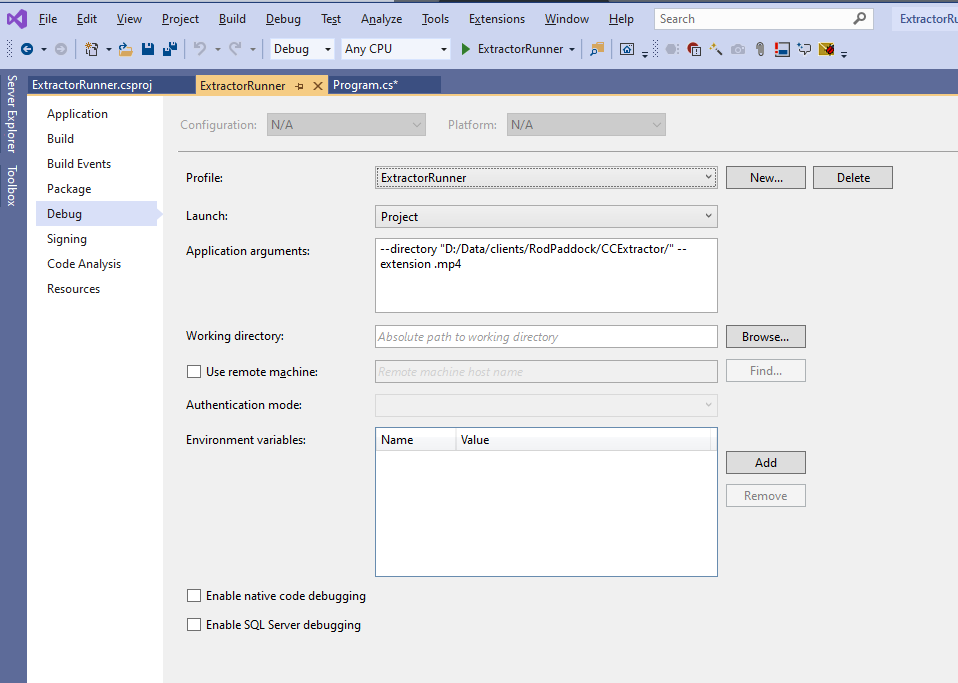
You can now run your code from visual studio. When testing your code you can call your application with arguments by opening your Project Properties Window, selecting the Debug section and passing specifying your parameters in the Arguments section. The following screen shows that:
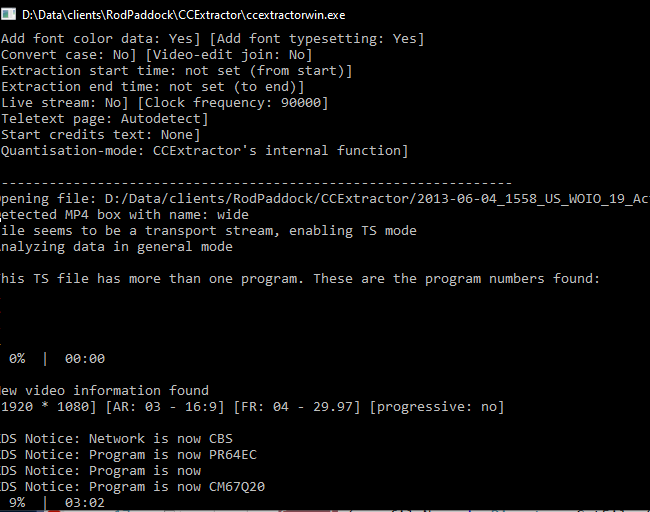
Your running program will now spawn a new process which looks like this:
At this point we have two programs one in Python and one in C#. They both accept similar named parameters and now call the ccextractor program based on global PATHs. Next step is to get the code running on platforms other than Windows.
Sometimes time is of essence when building little utility programs. Once the job of your utility is completed it may be useful to make that program more useful and more universal. Or it just might be a good way to learn something new for a blog post or just your own education.
I decided that this would be a cool opportunity to add some features to the batch runner I created for my friend. One item that was immediately needed changing was the ability to choose the extension of the files to process. My initial choice was to process mpg files as the default extension. My friend immediately changed it to mp4. This is a useful extension point and the first thing to parameterize.
This post will focus on the Python version first. We’ll look at the C# version in our next post. One way we could hack this together would be to use Python’s sys.argv[] array which provides positional arguments to Python programs. For instance if we called our program with the following statement:
python copy run_cc.py .mp4
we could access the .mp4 with sys.arg[0] While this works it will cause problems in the long haul if we add or remove parameters. It is also not very intuitive. It would be better to call the with a named parameter. For example:
run_cc.py –extension .mp4
Python has a built-in library to do this exact thing. This library is known as argparse. To implement our first option we need to do the following:
Add an import argparse to the imports section of our program
Create an argument parser object and add an argument to it. Your code will look like this:
parser = argparse.ArgumentParser()
parser.add_argument("--extension", help="Extension of files to convert", default='.mpg')

args = parser.parse_args()
There is a lot going on with just these few lies of code. What this set of code does is 1) Create an argument parser, 2)Adds a parameter called –extension to the command line. This parameter will be added the args array as a property with the name extension. parameter. Finally this code specifies a help description and a default parameter value. Our program code now looks like:
import os
import subprocess
import argparse

parser = argparse.ArgumentParser()
parser.add_argument("--extension", help="Extension of files to convert", default='.mpg')
args = parser.parse_args()

directory_to_import = 'D:/Data/clients/RodPaddock/CCExtractor/'
extractor_exe_path = 'D:/Data/clients/RodPaddock/CCExtractor/ccextractorwin'
for file in os.listdir(directory_to_import):
  if file.endswith(args.extension):
    print(os.path.join(directory_to_import, file))
    subprocess.run([extractor_exe_path,   os.path.join(directory_to_import, file)])
The next step is to add a parameter to specify the directory you wish to read files from. We’ll call the parameter –directory and will default it to (.) the current working directory. A sample call would be as follows:
import os
import subprocess
import argparse

parser = argparse.ArgumentParser()
parser.add_argument("--extension", help="Extension of files to convert", default='.mpg')
parser.add_argument("--directory", help="Directory to process", default='.')
args = parser.parse_args()

extractor_exe_path = 'D:/Data/clients/RodPaddock/CCExtractor/ccextractorwin'
for file in os.listdir(args.directory):
  if file.endswith(args.extension):
    print(os.path.join(args.directory, file))
    subprocess.run([extractor_exe_path,   os.path.join(args.directory, file)])
Finally lets get rid of the EXE path. We are going to “cheat” a bit on this one. We are simply going to add that directory to the PATH statement on the machine. This will sync its operation with the behavior on the Mac.
To change your PATH statement in Windows open the Environmental Variables from the Windows Start menu find PATH in the System variables and add the path to wherever you extracted the ccextractor application. The following screen demonstrates how this should look:
Changes to PATH statement in Environmental Variables Screen.
Now your final Python program will look like this:
import os
import subprocess
import argparse

parser = argparse.ArgumentParser()
parser.add_argument("--extension", help="Extension of files to convert", default='.mpg')
parser.add_argument("--directory", help="Directory to process", default='.')
args = parser.parse_args()

# should be added to the system PATH statement
extractor_name = 'ccextractorwin'
for file in os.listdir(args.directory):
  if file.endswith(args.extension):
    print(os.path.join(args.directory, file))
    subprocess.run([extractor_name,  os.path.join(args.directory, file)])
This completes part 2 of this series. In part 3 we will learn how to accomplish the same feature using C# across multiple platforms.
Earlier this week I got an e-mail from a friend. Here’s the gist of the e-mail (names have been excluded to protect the innocent LOL)
I have a command line tool installed through homebrew on my laptop running high sierra. The command is just ccextractor <filepath> and it runs fine in a standard bash terminal. I was hoping to use automator to be able to run it on batches of files, but i'm struggling with the syntax for the Run Shell Script command.
It just keeps saying ccextractor command not found.
Also the command line tool can only do one file at a time so I guess I need some way to loop the request so it does the first file, then runs the command again on the second file etc?
My friend is a fellow movie geek who wants to run CCExtractor on a batch of movie files.
The problem was my friend could not figure out how to use Automator (a Mac tool) to run this command on a directory of files. An attempt was made to use bash as well with no luck. Hence the e-mail.
I replied back that I could probably whip something up in Python if that would work. “Are you sure that’s not too much work?” my friend replied. “Nah it should be pretty simple to whip up.”, I replied.
Here’s the gist what I did.
Traveled to the https://www.ccextractor.org/ site and downloaded the binaries and some 3.x GB sample files to my drive.
Then I opened my trusty text editor (https://www.sublimetext.com/) is my editor of choice and started a new .py (python) prorgam.
After a bit of google-fu I came up with this set of code:
import os
import subprocess
directory_to_import = 'D:/Data/clients/RodPaddock/CCExtractor/'
extractor_exe_path = 'D:/Data/clients/RodPaddock/CCExtractor/ccextractorwin'
for file in os.listdir(directory_to_import):
  if file.endswith(".mpg"):
    print(os.path.join(directory_to_import, file))
    subprocess.run([extractor_exe_path, os.path.join(directory_to_import, file)])
This code was built, debugged and run on my Windows development box. The goal was to get it working as fast as possible on my main development box before moving it onto a Mac.
Getting the code to run on the Mac was simple. Here’s that version:
import os
import subprocess
directory_to_import = '/Users/rodpaddock/ccextractor'
extractor_exe_path = 'ccextractor'
for file in os.listdir(directory_to_import):
  if file.endswith(".mpg"):
    print(os.path.join(directory_to_import, file))
    subprocess.run([extractor_exe_path,   os.path.join(directory_to_import, file)])
As you can see the changes were minimal at best. I changed the path to my user directory on the Mac and git rid of the specific path to the executable. I used brew to install the CCExtractor on my mac so it was in the PATH already. After installing Python version 3.x on my old Mac I was able to run the application as-is. No operating specific issues.
After getting it to work I sent it off to my fiend who simply changed the path to the files to decode and BOOM it just worked.
After marveling at how much could be accomplished with so few lines of code, I became curious to see how complex it would be to build the same application in C#. I’m using .NET Core to do this, as I want to run it cross platform as well.
Here’s the same functionality in C#
using System;
using System.Diagnostics;
using System.IO;

namespace ExtractorRunner
{
  class Program
  {
  static void Main(string[] args)
   {
    var directory_to_import = "D:/Data/clients/RodPaddock/CCExtractor/";
    var extractor_exe_path = "D:/Data/clients/RodPaddock/CCExtractor/ccextractorwin";
    foreach (var fileName in Directory.GetFiles(directory_to_import,"*.mpg"))
    {
      Console.WriteLine(fileName);
      var process = new Process()
	{
	  StartInfo = new ProcessStartInfo
		{
		FileName = $"{extractor_exe_path}",
		Arguments = $"{fileName}",
		UseShellExecute = true,
	 }
	};
	 process.Start();
   }
  }
 }
}
Not too bad .NET core. It was pretty simple to build this application and get it running in a console application.
Now that I have this code, I think it would be fun to explore making it a bit more useful. I’m doing this as an exercise to learn a few more things about building more robust Python and C# console applications. Here’s a set of features I plan on adding:
Accept an extension parameter (I started with .mpg files) my friend had to change the extension to .mp4 files.
Accept the path to decode as a parameter.
Accept the path to the executable as a parameter
Parameters should be named vs positional if possible.
I relocated my family from Seattle, WA to Austin, TX, in August of 2008. At that time, my bank accounts (personal and business) were with Bank of America. The nice thing about this arrangement was the Bank of America branch right up the street from my new house. This seemed like total win. That is until several things converged that made me re-evaluate this relationship.
If you recall, August of 2008 was the height of the financial crisis. As the banks were getting bailed out by taxpayers, they were simultaneously cutting off access to credit for their customers. I had a number of credit lines that were paid off but would have provided a lifeline should the need ever arise. Well that lifeline was withdrawn arbitrarily by several banks including BOA.
The second thing that happened was my move to Austin where a number of stores participated in an initiative called GO LOCAL. The idea behind GO LOCAL was that monies spent with local businesses.stayed in the communities where they were spent. This made total sense. Wherever possible I did my best to shop at local stores and restaurants (not chains).
The last straw was the total lack of customer service with the local branch of BOA. Every week or so I would show up, in person, to deposit checks into my account. Every time I went in I was treated like a complete stranger vs a valued customer. Now I get that as a person new to that branch it might take some time to become familiar with me and my small company. Well this familiarity was never achieved. Almost every time I was at the store I banked with THE SAME PERSON. This person NEVER even hinted at a sign of recognition. This was over a period of 6 or more months.
It was this total lack of disregard that made me act. I decided that the best thing to do was to GO LOCAL. I would open new personal and business accounts with a local institution. In this case it was UFCU (University Federal Credit Union) which, lucky for me was located right around the corner from my house too.
I was NOT looking forward to the task of moving numerous auto draft transactions attached to my current bank accounts. This included payroll, credit cards, house payments, utilities, etc. How would I do this with as little disruption as possible. My strategy was turned out to be simple: keep my old accounts open while I move everything to the new accounts. I started by examining each bank statement and seeing what vendors were being paid from my accounts. I opened each vendor’s respective site and changed the auto billing information. This took a few months as some bills were not monthly. After a few months I left a reasonable amount in each account, you know, just in case
Now you might have a few concerns about banking with small local banks. For example you may thing: the small banks do not have all of the conveniences of the big banks. I have a one-word answer to this concern: BLAHBLAH :),
These small banks have access to the same technology as the big banks and in many cases are much more efficient at deploying it. For instance, we have purchased several cars using our credit union. The way they do this is unique. They give us a “blank check” that we take to the car dealer and purchase our car. This is not technically a blank check, but a check that with a limit up to the max amount we were approved to finance. When we finished our negotiations to purchase our vehicles, we fill in the amount of the purchase and sign the check. A few days later, after the car dealer cashes the check we get a call from the credit union and we sign the final contract for our loan. Oh, and this is all done via Docusign. This is a very cool experience and works well. The added benefit is that the interest paid on the loan is reasonable and STAYS IN THE COMMUNITY.
One added benefit is the RELATIONSHIP I have with my credit union. I know the people I bank with, and when I have issues, or need help they are there for me. And in the year 2020 this was especially true. As the Covid virus took over the world and caused a disruption to the economy (including my business) I heard about the Payroll Protection Program which would provide a two months of assistance in making payroll. I was LUCKY enough to secure one of these SBA PPP loans in the first round. I feel that this was due to the fact I had a relationship with my credit union and that they were agile enough to implement their loan program quickly. I have heard directly that some of the larger banks outsourced their work and failed to get the loans their customers really needed.
My credit union was the opposite. They treated their customers with respect and concern and helped secure these desperately needed loans. This isreally assuring and gives me confidence that my decision to bank locally was a good one.
One of the most interesting aspects of Cryptography is the ability to generate unique hash values from strings or files.
Wikipedia Defines Cryptographic as follows:
A cryptographic hash function is a hash function that is suitable for use in cryptography. It is a mathematical algorithm that maps data of arbitrary size to a bit string of a fixed size and is a one-way function, that is, a function which is practically infeasible to invert
The most common use of hashes is to store hashed (vs plain text) values of passwords in databases.
Another use case of hashes is to detect changes to files. A few years back we built a script runner that would only run new or changed files from a given scripts folder. The basic algorithm for this was:
1) Read all file names from a folder.

2) Look for for a file same name with a .HASH extension.
    If .HASH file was missing:
      a) Run the script file
      b) Create a new file with a .HASH extension.
      c) Hash the script file and store the result in
         the .HASH file

3) If the .HASH file already existed:
    a) Generate a hash value of the script file
    b) Compare value the hash value stored in the .HASH file.
    c) If they were the same we ignore the file.
    d) If they were different Run the script,
       re-generate the hash and store the results
       in the .HASH file.
The core of these processed is a little nugget of code I built up a few years back .I thought it would be good to share my hashing function with the world. The following code generates a SHA512 has for a given string. The code then takes the generated byte array converts it to a string:
public static string GenerateHash(string stringToHash)
{
  var crypt = new SHA512Managed();
  var hash = new StringBuilder();
  var crypto = crypt.ComputeHash(Encoding.UTF8.GetBytes(stringToHash), 0,
    Encoding.UTF8.GetByteCount(stringToHash));

    foreach (var bit in crypto)
    {
      hash.Append(bit.ToString("x2"));
    }

    return hash.ToString();
}
I built a little command line utility that implements this function and can generate a hash for a passed in string or file. You can find this utility on Github:
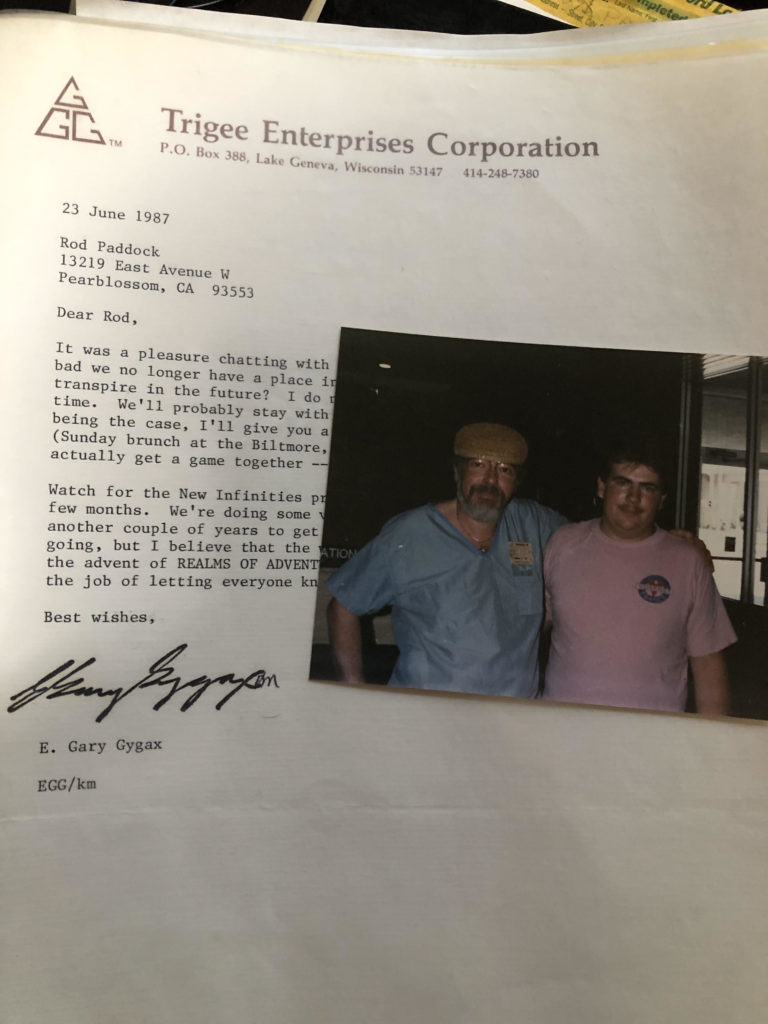
My last post Adventured in Writing Part 1 talked about my experiences as a fledgling writer and how I published my 1st article. That experience was truly life affirming. Unfortunately, that was my 1st and last D&D related article. But this did happen:
Met Gary Gygax at a conference in Evansville, Indiana.
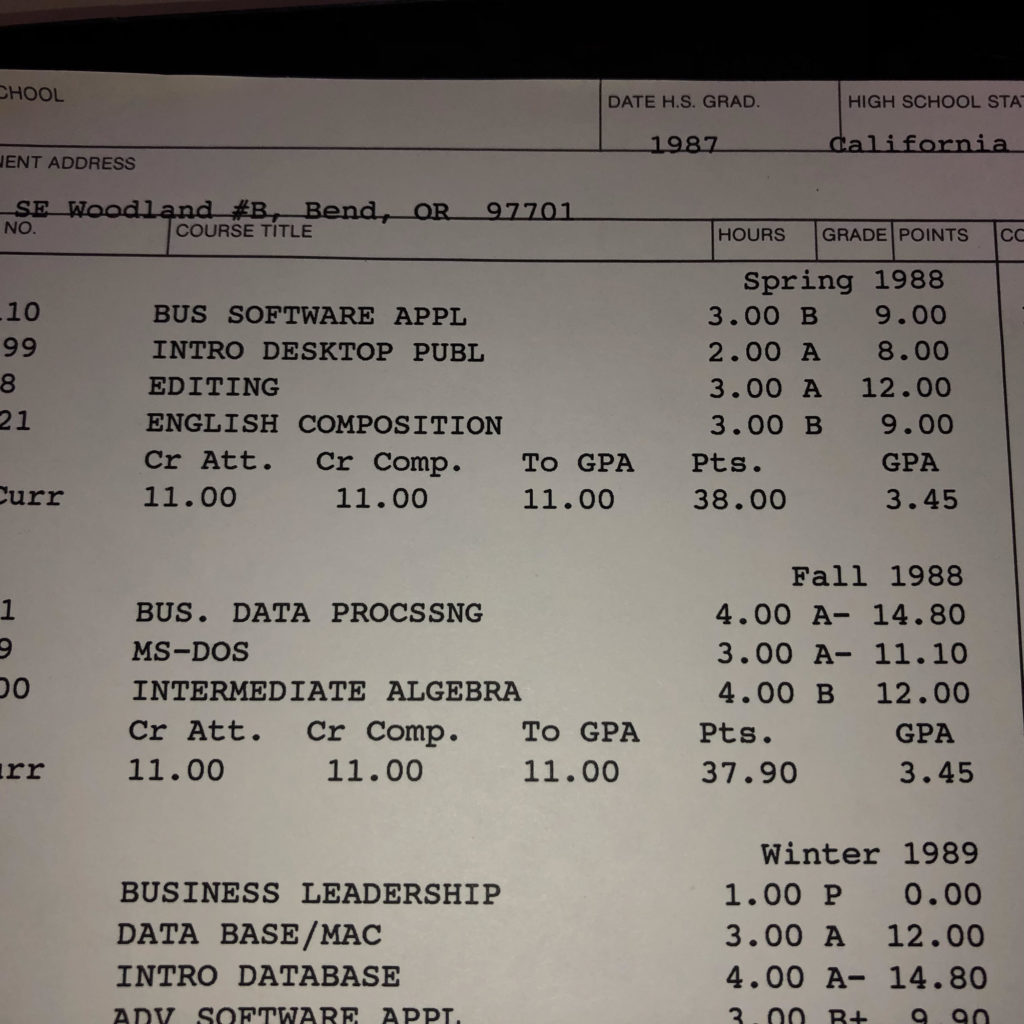
Not too long after the D&D article was published, my family moved to Bend Oregon where I registered at Central Oregon Community College. When I built my schedule, I took as many classes as possible that related to writing and publishing. Here’s my schedule (Yes, I have a lot of this crap in my binders)
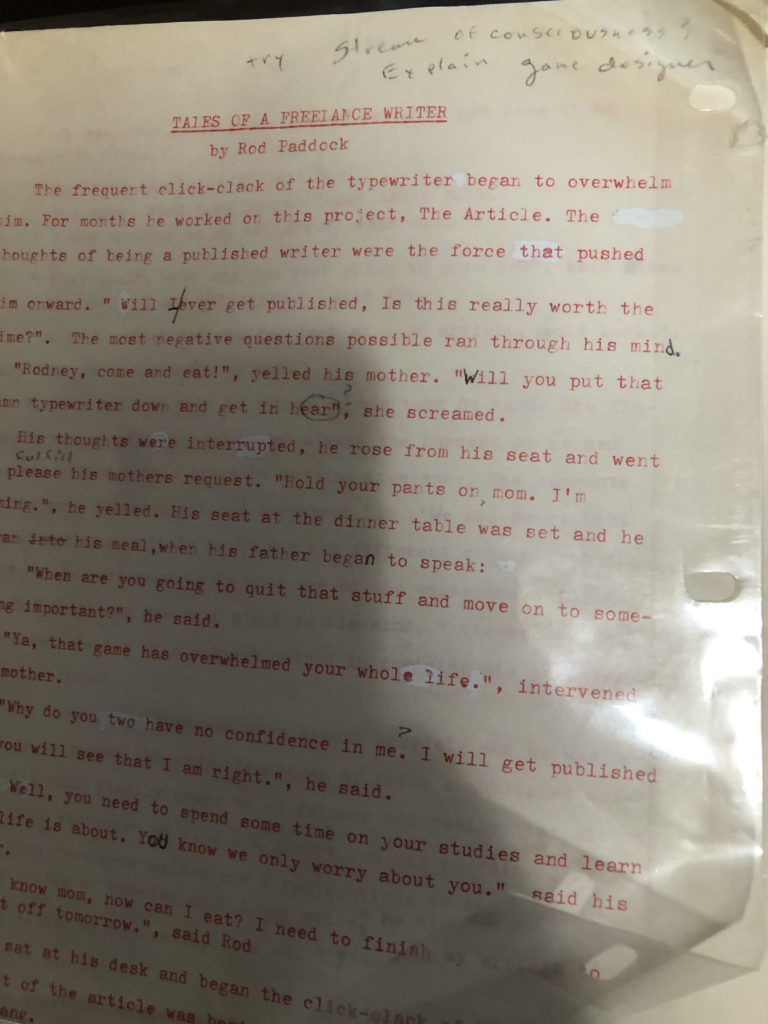
I had every plan on becoming a full-time writer. As a matter of fact, one of my first papers for writing comp was called “Tales of a freelance writer”. Check out the red typewriter ink on this baby:
Term Paper For The Win!
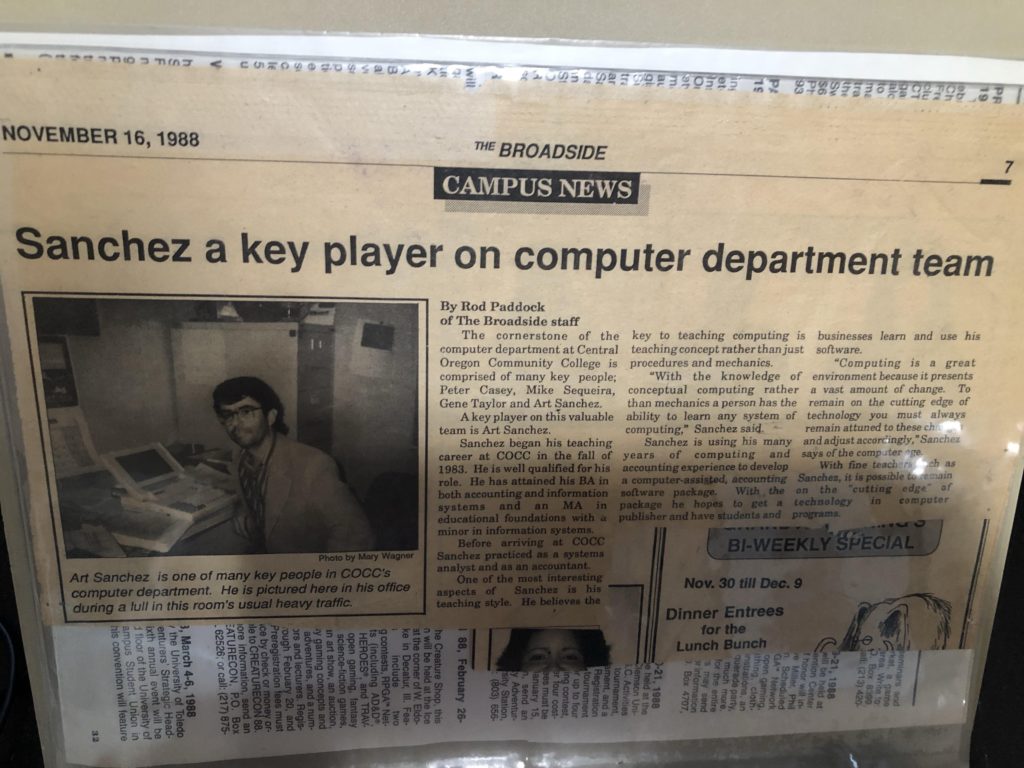
During my tenure at C.O.C.C. I kept the dream of writing alive and the college newspaper became my outlet. I wrote few profiles of a couple of my instructors. Presented for your enjoyment: my profiles of Art Sanchez and Gene Taylor
Profile of Art Sanchez
One item I would like to note is that these two professors were in the Business Software track at the community college. I had changed my focus from becoming a writer to becoming a computer programmer. If you look at my schedule, you’ll see that in the 2nd and following semesters I took more and more technology programs. After a little more than 2 years I had succeeded in becoming a programmer. But what happened to my writing? Honestly my writing took a back seat to my coding. I had traded one passion for another.
After spending a few years as a programmer for a local vacation resort I set out for the big city: SEATTLE! After a brief stint working at CSC (Computer Sciences Corp), I went to work for a company called The Juiceman. You remember the Juiceman:
You know you’ve made it as a company when Jim Carry mocks your founder 😊 At the Juiceman I worked on a kick ass team where we toiled building innovative order entry, fulfillment and payment processing systems. For the time this was large scale application capable of supporting literally hundreds of users (LOL)
Our company was exploding at the seams and our team was in a race to keep up with the growth. One night we were deploying our software and things went horribly wrong. A conversion application we had written was seriously flawed and we had to roll back our deployment. This recovery was done with a partial backup I had miraculously created. It was not a planned backup, it was a lucky backup. After a very LONG night another LONG day after we managed to recover.
After some sorely needed rest we took time analyze what went wrong. I took copious notes. These notes rekindled something that had gone dormant: my desire to be a writer. “This could be a cool article” I thought to myself. But where to publish this article. In the next post I’ll talk about getting published professionally.